|
|
6 gadi atpakaļ | |
|---|---|---|
| .. | ||
| LICENSE | 6 gadi atpakaļ | |
| MBProgressHUD.h | 6 gadi atpakaļ | |
| MBProgressHUD.m | 6 gadi atpakaļ | |
| README.mdown | 6 gadi atpakaļ | |
README.mdown
MBProgressHUD
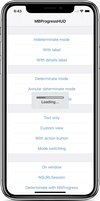
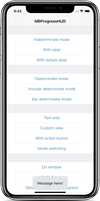
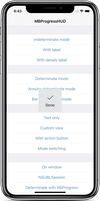
MBProgressHUD is an iOS drop-in class that displays a translucent HUD with an indicator and/or labels while work is being done in a background thread. The HUD is meant as a replacement for the undocumented, private UIKit UIProgressHUD with some additional features.
NOTE: The class has recently undergone a major rewrite. The old version is available in the legacy branch, should you need it.
Requirements
MBProgressHUD works on iOS 6+ and requires ARC to build. It depends on the following Apple frameworks, which should already be included with most Xcode templates:
- Foundation.framework
- UIKit.framework
- CoreGraphics.framework
You will need the latest developer tools in order to build MBProgressHUD. Old Xcode versions might work, but compatibility will not be explicitly maintained.
Adding MBProgressHUD to your project
CocoaPods
CocoaPods is the recommended way to add MBProgressHUD to your project.
- Add a pod entry for MBProgressHUD to your Podfile
pod 'MBProgressHUD', '~> 1.1.0' - Install the pod(s) by running
pod install. - Include MBProgressHUD wherever you need it with
#import "MBProgressHUD.h".
Carthage
- Add MBProgressHUD to your Cartfile. e.g.,
github "jdg/MBProgressHUD" ~> 1.1.0 - Run
carthage update - Follow the rest of the standard Carthage installation instructions to add MBProgressHUD to your project.
Source files
Alternatively you can directly add the MBProgressHUD.h and MBProgressHUD.m source files to your project.
- Download the latest code version or add the repository as a git submodule to your git-tracked project.
- Open your project in Xcode, then drag and drop
MBProgressHUD.handMBProgressHUD.monto your project (use the "Product Navigator view"). Make sure to select Copy items when asked if you extracted the code archive outside of your project. - Include MBProgressHUD wherever you need it with
#import "MBProgressHUD.h".
Static library
You can also add MBProgressHUD as a static library to your project or workspace.
- Download the latest code version or add the repository as a git submodule to your git-tracked project.
- Open your project in Xcode, then drag and drop
MBProgressHUD.xcodeprojonto your project or workspace (use the "Product Navigator view"). - Select your target and go to the Build phases tab. In the Link Binary With Libraries section select the add button. On the sheet find and add
libMBProgressHUD.a. You might also need to addMBProgressHUDto the Target Dependencies list. - Include MBProgressHUD wherever you need it with
#import <MBProgressHUD/MBProgressHUD.h>.
Usage
The main guideline you need to follow when dealing with MBProgressHUD while running long-running tasks is keeping the main thread work-free, so the UI can be updated promptly. The recommended way of using MBProgressHUD is therefore to set it up on the main thread and then spinning the task, that you want to perform, off onto a new thread.
[MBProgressHUD showHUDAddedTo:self.view animated:YES];
dispatch_async(dispatch_get_global_queue( DISPATCH_QUEUE_PRIORITY_LOW, 0), ^{
	// Do something...
	dispatch_async(dispatch_get_main_queue(), ^{
		[MBProgressHUD hideHUDForView:self.view animated:YES];
	});
});
You can add the HUD on any view or window. It is however a good idea to avoid adding the HUD to certain UIKit views with complex view hierarchies - like UITableView or UICollectionView. Those can mutate their subviews in unexpected ways and thereby break HUD display.
If you need to configure the HUD you can do this by using the MBProgressHUD reference that showHUDAddedTo:animated: returns.
MBProgressHUD *hud = [MBProgressHUD showHUDAddedTo:self.view animated:YES];
hud.mode = MBProgressHUDModeAnnularDeterminate;
hud.label.text = @"Loading";
[self doSomethingInBackgroundWithProgressCallback:^(float progress) {
	hud.progress = progress;
} completionCallback:^{
	[hud hideAnimated:YES];
}];
You can also use a NSProgress object and MBProgressHUD will update itself when there is progress reported through that object.
MBProgressHUD *hud = [MBProgressHUD showHUDAddedTo:self.view animated:YES];
hud.mode = MBProgressHUDModeAnnularDeterminate;
hud.label.text = @"Loading";
NSProgress *progress = [self doSomethingInBackgroundCompletion:^{
	[hud hideAnimated:YES];
}];
hud.progressObject = progress;
Keep in mind that UI updates, inclining calls to MBProgressHUD should always be done on the main thread.
If you need to run your long-running task in the main thread, you should perform it with a slight delay, so UIKit will have enough time to update the UI (i.e., draw the HUD) before you block the main thread with your task.
[MBProgressHUD showHUDAddedTo:self.view animated:YES];
dispatch_time_t popTime = dispatch_time(DISPATCH_TIME_NOW, 0.01 * NSEC_PER_SEC);
dispatch_after(popTime, dispatch_get_main_queue(), ^(void){
	// Do something...
	[MBProgressHUD hideHUDForView:self.view animated:YES];
});
You should be aware that any HUD updates issued inside the above block won't be displayed until the block completes.
For more examples, including how to use MBProgressHUD with asynchronous operations such as NSURLConnection, take a look at the bundled demo project. Extensive API documentation is provided in the header file (MBProgressHUD.h).
License
This code is distributed under the terms and conditions of the MIT license.
Change-log
A brief summary of each MBProgressHUD release can be found in the CHANGELOG.


